As of Microsoft Dynamics 365 version 9.0 we can add auto-number fields and the great thing about them is that the number itself is managed by the system, so there’s no need for extra code / plugins to manage incrementing the number. Plus there are loads of formatting options, so it should fit in most situations.
The bad thing about them is that there is no interface to manage them, and the only way to create them is programmatically. That’s where this post comes in, I’ve supplied a C# windows program which can be used to connect and create new auto-number fields.
Note: the XRMToolbox does have a similar plugin to do this, however at the time of writing this the plugin was not compatible with the latest version of XRMToolbox so it was not working. So I put this together and I thought having a standalone tool would be useful.
The Dynamics 365 auto-number program source code can be downloaded here.
Using the Program
Once you have downloaded the program, build and run it within Visual Studio 2017. It’s a simple program and there’s only 1 form within the project, once it’s loaded you’ll see this form:
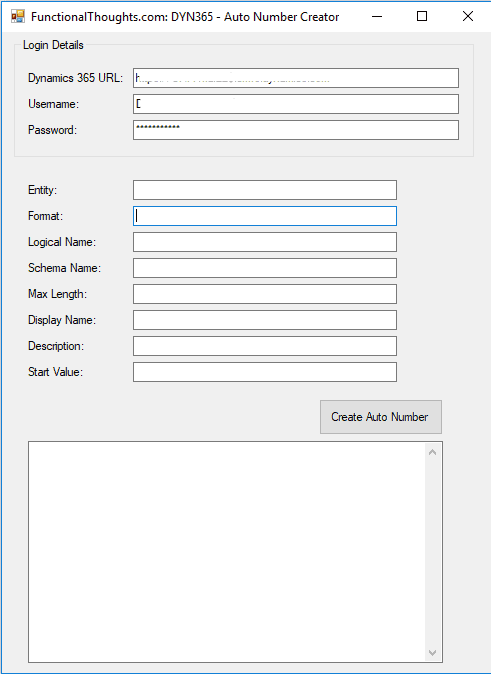
Here’s an explanation of each of the fields – for the examples below I’ll be adding an auto-number field to the lead entity called “Lead ID”
- Dynamics 365 URL: The Dynamics 365 URL i.e. the same URL you would use to access the system within a web browser. E.g. https://OrgName.crm6.dynamics.com
- Username: The Office365 username e.g. someone@OrgName.com
- Password: The Office365 password
- Entity: The name of the entity you wish the add the auto-number too, e.g. lead. NOTE: Ensure it’s lowercase and matches the Name field for the entity within the customization area.
- Format: Format of the auto-number. There are loads of options and they can be found in this Microsoft article. For this example we are using going to create a 7 digit incrementing number: {SEQNUM:7}
- Logical Name: the new field’s logical name (all lowercase) e.g. new_leadid
- Schema Name: the new field’s schema name e.g. new_LeadId
- Max Length: the maximum length of the new field. Since it’s a 7 digit number I’m setting mine to 7 e.g. 8
- Display Name: the display name of the new field e.g. Lead ID
- Description: the new field description e.g. System managed auto-number field
- Start Value: OPTIONAL. by default the start value is 1000. Enter a start value here if you wish the field to start at another number. I’ll set mine to 1.
Here’s what my values look like using the example above:
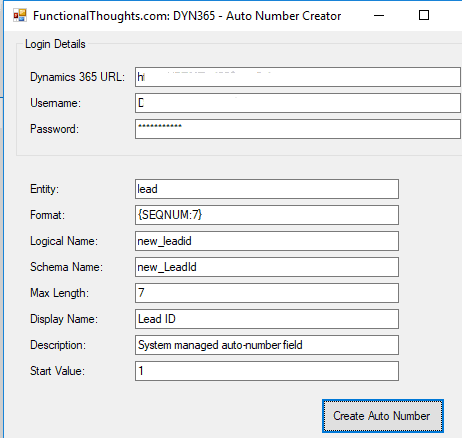
Clicking Create Auto Number created the field on the Lead entity for me and produced the following output:
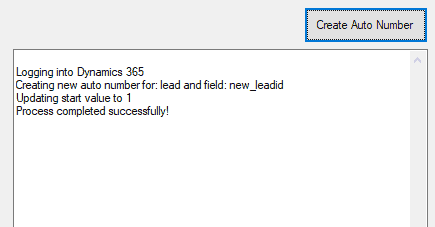
The Results
Now the program has created the field, I can open the lead form in design mode and add the “Lead ID” field to my form:
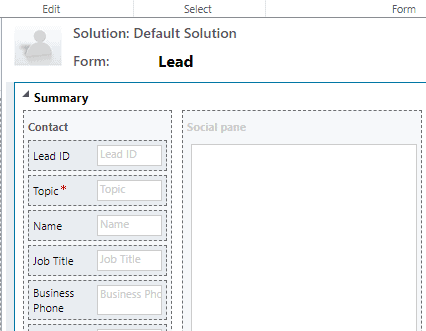
Save and publish, then you are done!
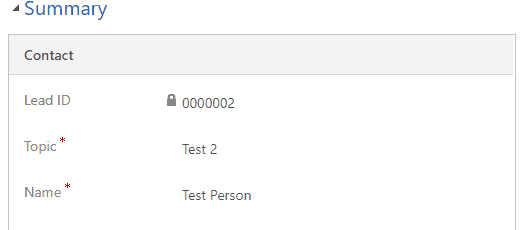
Now when I save a new lead I get a new 7 digit ID assigned to it:
Feel free to comment if you have any questions.

Im grateful for the article. Much thanks again. Great. Valerye Dennison Rodmann