Last week I found myself in a position where a Microsoft Flow that I manage was having issues and this got me thinking – there has to be a better way to manage error handling within my Flows. Coming from a C# programming background, a
What is a Try / Catch / Finally Block?
Try / Catch / Finally blocks are used in a number of programming languages: C++, Java, Javascript, C# etc.
They are used to manage and handle exceptions within a program and are typically structured like this:
|
1 2 3 4 5 6 7 8 9 10 11 12 13 14 |
Try{ //Program Logic goes here } catch() { //Exception / Error Handling logic goes here } finally { //Program logic executed after the try block or an exception has //occurred. } |
The Try block contains program logic (or part of it) and the Catch block contains the error handling logic (i.e. if some part of the logic within the Try block has an error, the program will jump into the Catch block to execute the error handler).
The Finally block is executed after the Try block’s logic regardless of an error occurring i.e. if there’s no error, it’s executed after the Try block, if there was an error, it’s executed after the Catch block.
This website has a great graphical representation of this logic.
How to implement Try / Catch / Finally block in Microsoft Flow
Try / Catch / Finally logic is implemented within Microsoft Flow using 3 Scope controls and by tweaking their run after conditions. The scope controls will contain the logic we want to execute within each block:
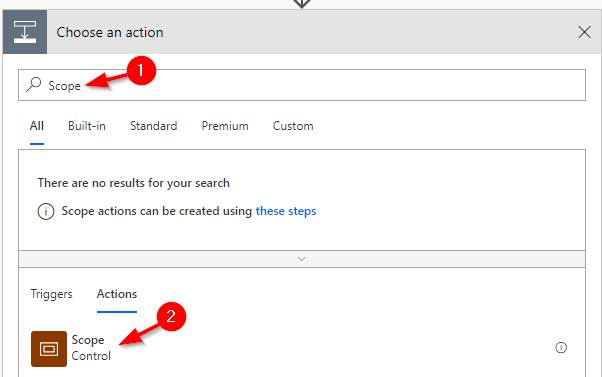
- Click New Step within your Flow
- Search for “Scope” and select Scope Control from within the results.
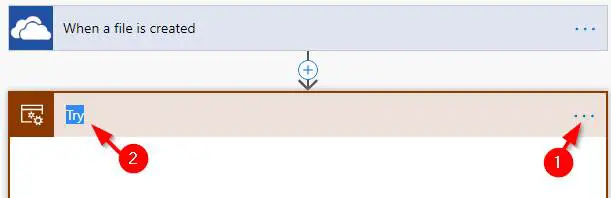
- Click the 3 dots (…) in the top right of the Scope Control and Select Rename. Type the name Try
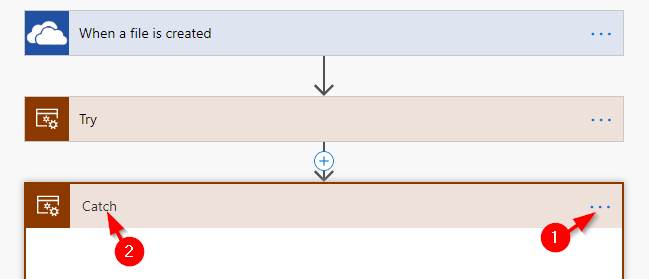
- Repeat Steps 1 and 2 to add a new Scope Control directly under the Try scope we just created.
- Click the 3 dots (…) in the top right of the new Scope Control and name it Catch.
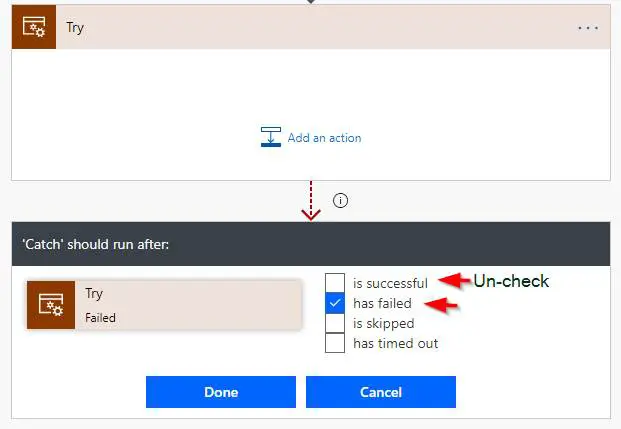
- Click the 3 dots (…) in the top right of the Catch Scope Control and select Configure run after.
- Un-check “is successful” and check “has failed” and click Done
- Repeat Steps 1 and 2 to add a new Scope Control directly under the Try scope we just created.
- Click the 3 dots (…) in the top right of the new Scope Control and name it Finally.
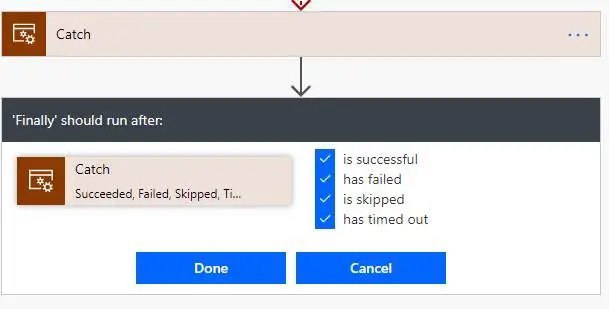
- Click the 3 dots (…) in the top right of the Finally Scope Control and select Configure run after.
- Check all the boxes and click Done
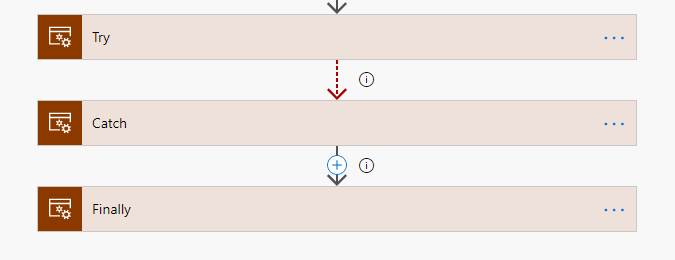
That’s it, now you have the structure in place you can split out and place the logic you need within each Scope.
The final layout should look like this:
Note: There’s no way to
catpure the actual error message within Flow at this point in time. We hope that Microsoft updates this one day soon!