If you’re new to Microsoft Dynamics 365 development you may be wondering how to connect to it via a .Net C# console application or would like to set up a Visual Studio project to get started with the Dynamics 365 SDK.
In this post I’ll take you through setting up the Visual Studio project, adding the Dynamics 365 SDK references, connecting to Dynamics 365 and running a basic query to validate.
Setting up a new Visual Studio 2017 Project with Dynamics 365 SDK References
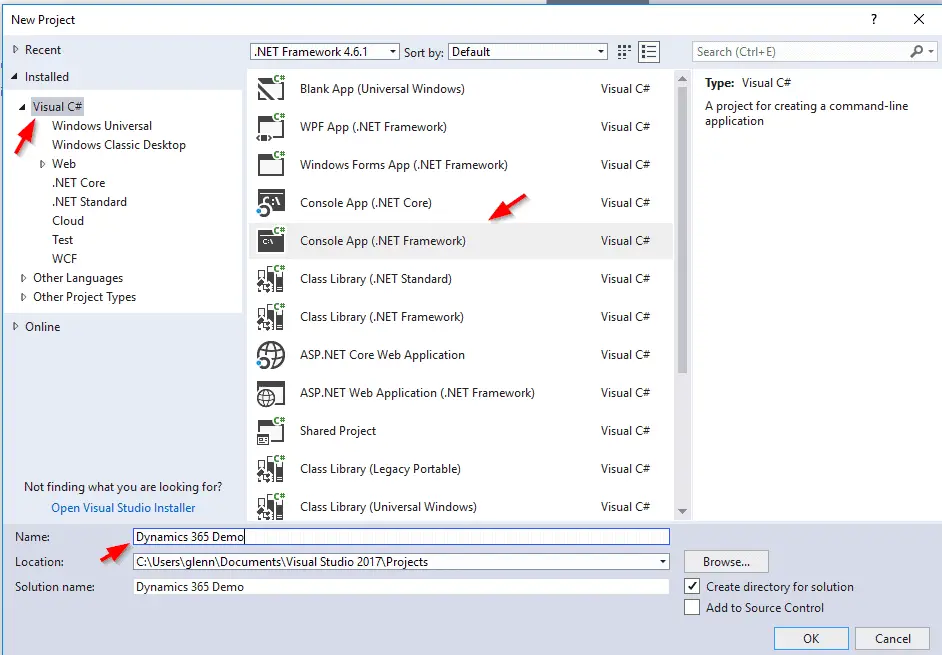
- Open Visual Studio 2017 and select File | New | Project
- Click on Visual C# and select Console App (.Net Framework)
- Enter a project name within the Name field and click Ok
The next step is to add the Dynamics 365 SDK references to the project and this is quite easy now it’s managed via NuGet.
- Select Tools | NuGet Package Manager | Manage NuGet Packages for Solution
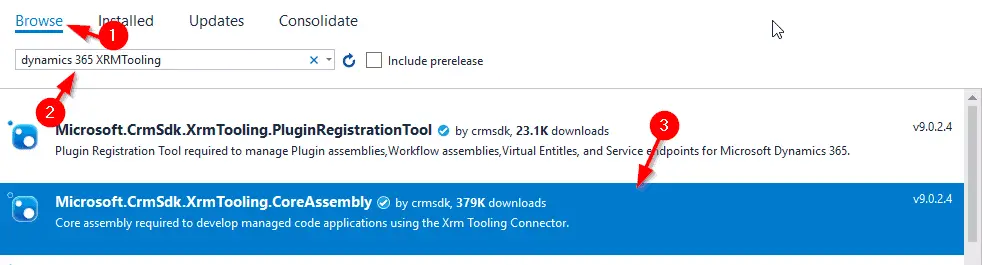
- This screen defaults to showing the installed packages, click Browse
- In the Search textbox type: Dynamics 365 XRMTooling and select Microsoft.CrmSdk.XrmTooling.CoreAssembly
- Select the Project in the right-hand side window and click Install
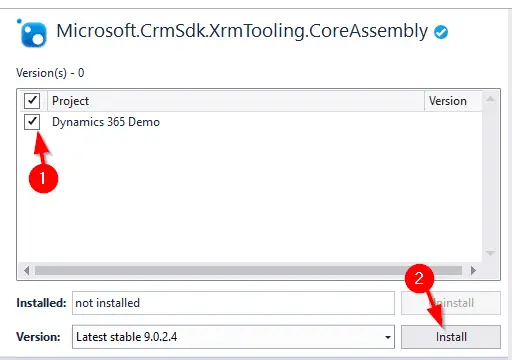
- If prompted by a “Preview Changes” dialog box, click Ok
- Click I Accept when prompted by the License Acceptance dialog
- We need to add one more package, search for Microsoft.CrmSdk.CoreAssemblies under the browse tab and follow the same process to add it to the project too.
Alternatively, this same process can be done from the Nuget command line by:
- Navigate to Tools | Nuget Package Manager | Package Manager Console
- Within the package manager console copy and paste the following command:
|
1 2 |
Install-Package Microsoft.CrmSdk.XrmTooling.CoreAssembly -Version 9.0.2.4 Install-Package Microsoft.CrmSdk.CoreAssemblies -Version 9.0.2.4 |
Note that as of this post, the latest version is 9.0.2.4, to get the latest version check here.
The process above has added all the SDK DLL’s we need within the project References, so there’s no messing around to manually add them.
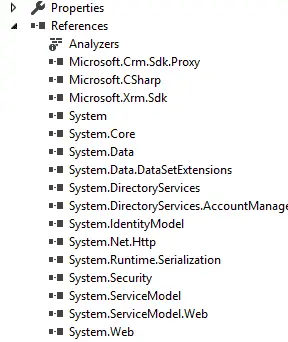
Now that’s done, we are ready to start coding!
Cutting the Code
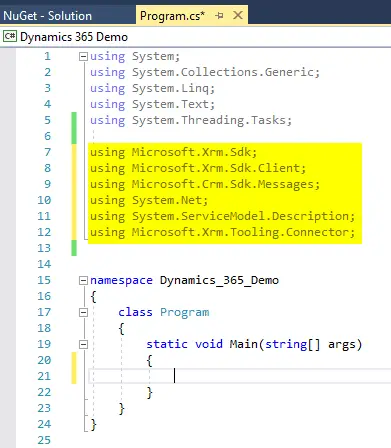
- Add the following namespaces to the top of Program.cs:
|
1 2 3 4 5 6 |
using Microsoft.Xrm.Sdk; using Microsoft.Xrm.Sdk.Client; using Microsoft.Crm.Sdk.Messages; using System.Net; using System.ServiceModel.Description; using Microsoft.Xrm.Tooling.Connector; |
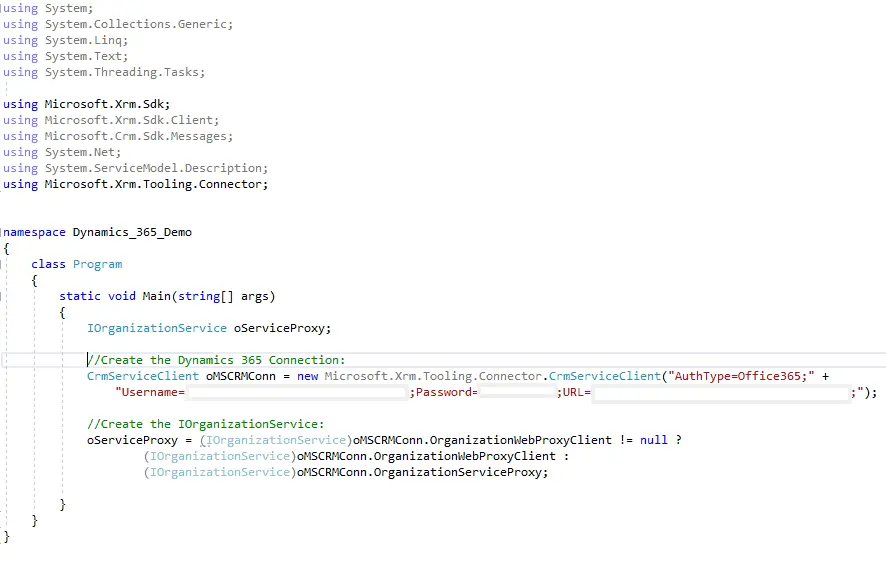
- Next comes the connection code and the aim is to create an IOrganizationService object which connects to Dynamics365 via a client connection and provides pragmatic access to Dynamics 365. Copy and paste the following code into the Main method:
|
1 2 3 4 5 6 7 |
IOrganizationService oServiceProxy; //Create the Dynamics 365 Connection: CrmServiceClient oMSCRMConn = new Microsoft.Xrm.Tooling.Connector.CrmServiceClient("AuthType=Office365;Username=<USERNAME>;Password=<PASSWORD>;URL=<URL>;"); //Create the IOrganizationService: oServiceProxy = (IOrganizationService)oMSCRMConn.OrganizationWebProxyClient != null ? (IOrganizationService)oMSCRMConn.OrganizationWebProxyClient : (IOrganizationService)oMSCRMConn.OrganizationServiceProxy; |
Within the CrmServiceClient string replace the following variables in your code:
- <USERNAME> = the Dynamics username e.g. someone@DYN365Demo.onmicrosoft.com
- <PASSWORD> = the user password
- <URL> = the Dynamics 365 instance URL. This is this is the same URL that would be used to access it from a web browser (minus the page “/main.aspx#####”) e.g.:
https://DYN365Demo.crm6.dynamics.com
- Add the following code underneath to check the connection by attempting to retrieve the current user ID:
|
1 2 3 4 5 6 7 8 9 10 11 12 13 14 |
if (oServiceProxy != null) { //Get the current user ID: Guid userid = ((WhoAmIResponse)oServiceProxy.Execute(new WhoAmIRequest())).UserId; if (userid != Guid.Empty) { Console.WriteLine("Connection Successful!"); } } else { Console.WriteLine("Connection failed..."); } |
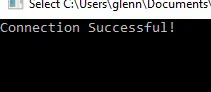
And you’re done. Click the Start button to run the program and if the connection details are correct you should see “Connection Successful!”:
To keep the example above simple I’ve left out proper error handling, but for the sake of completeness I’ve included the full code below with a try / catch and some additional outputs to the console to show where it’s at:
|
1 2 3 4 5 6 7 8 9 10 11 12 13 14 15 16 17 18 19 20 21 22 23 24 25 26 27 28 29 30 31 32 33 34 35 36 37 38 39 40 41 42 43 44 45 46 47 48 49 50 51 52 53 54 55 56 57 58 59 |
using System; using System.Collections.Generic; using System.Linq; using System.Text; using System.Threading.Tasks; using Microsoft.Xrm.Sdk; using Microsoft.Xrm.Sdk.Client; using Microsoft.Crm.Sdk.Messages; using System.Net; using System.ServiceModel.Description; using Microsoft.Xrm.Tooling.Connector; namespace Dynamics_365_Demo { class Program { static void Main(string[] args) { IOrganizationService oServiceProxy; try { Console.WriteLine("Setting up Dynamics 365 connection"); //Create the Dynamics 365 Connection: CrmServiceClient oMSCRMConn = new Microsoft.Xrm.Tooling.Connector.CrmServiceClient("AuthType=Office365;Username=<USERNAME>;Password=<PASSWORD>;URL=<URL>;"); //Create the IOrganizationService: oServiceProxy = (IOrganizationService)oMSCRMConn.OrganizationWebProxyClient != null ? (IOrganizationService)oMSCRMConn.OrganizationWebProxyClient : (IOrganizationService)oMSCRMConn.OrganizationServiceProxy; Console.WriteLine("Validating Connection"); if (oServiceProxy != null) { //Get the current user ID: Guid userid = ((WhoAmIResponse)oServiceProxy.Execute(new WhoAmIRequest())).UserId; if (userid != Guid.Empty) { Console.WriteLine("Connection Successful!"); } } else { Console.WriteLine("Connection failed..."); } } catch (Exception ex) { Console.WriteLine("Error - " + ex.ToString()); } Console.ReadKey(); } } } |
Feel free to leave any questions in the comments section below.
Great article Glenn; direct, accurate and concise. Thank you.
i am doing the same thing but getting unable to login error. not sure what i am missing
Hi Dinesh,
Can you please send on the error you are receiving?
Cheers,
Glenn
Hai Glen I also trying to connect d365 i getting the error “An unsecured or incorrectly secured fault was received from the other party. See the inner FaultException for the fault code and detail.”
showing
Hi Venkat,
This error is usually caused by your computer’s clock being out of sync with the Dynamics server.
I recommend checking the clock on both to make sure they are correct and try the connection again.
May be if you are using latest CRM Online version then you may need to change Auth Type to OAuth as Office 365 is deprecated
Good point Prashant – I’ll get an updated post up soon.